
My brain has been buzzing since before we moved in on how I would upgrade this room.
I took to Pinterest for inspiration...obvi...and found some fun ideas for paint colors and stenciling.
Now, it's not done. But the bulk of my weekends between January 1 and today has been taping, painting, rolling, more taping, measuring, leveling, stenciling, adjusting and re-adjusting my work.
This was the process:
I present you with our entrway/sitting room.
It's a blank canvas of white on beige on taupe, and littered with my tchochkes that need a home and various other random things that don't belong.
The bones of this space are fantastic.
Chunky crown moulding, beautiful drapery, textured plaster ceilings (NOT popcorn, thank the lawd).


This is what I found inside the large return vent on that big ole blank wall.
I had to paint the vent to match the wall and I do believe that vent had never been cleaned out in 20-30 years.
 |
| YIKES!! |
That wall has a herringbone textured wallpaper on it that I painted over.
It's still a blank slate, but with a better color, that I plan to add large white gallery frames to.

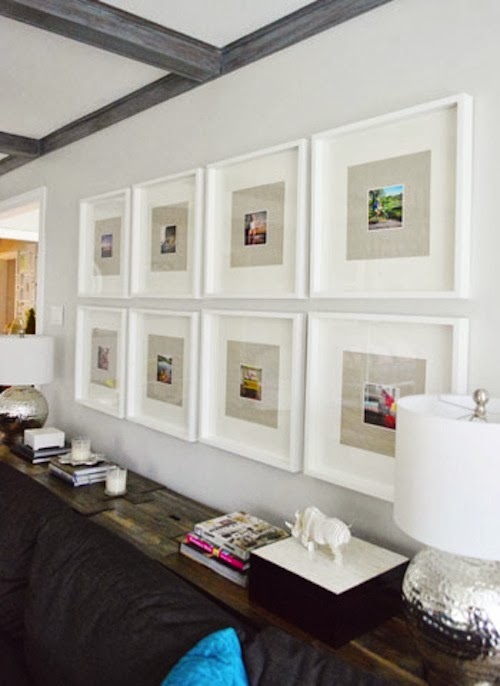 |
| Frame Inspiration |
The sitting room had the same matte paint applied to it, but the fun part was stenciling the fleur-de-lis pattern over the matte finish in a matching high gloss paint.
And by fun, I mean totally time consuming.
But the result was totally worth it.
 |
| Drapery is covered and taping completed |
 |
| Burn destroying 1 of 4 of my stencils before I even started. Awesome. |
 |
| Getting there! |
And finally, the finished product!
(Keep in mind that I still need to reposition the furniture and add accessories.
That will come in time, and when I have more funds to do so.)


Paint: Sherwin Williams Urbane Bronze in matte finish
Stencil: Purchased HERE in the 12" x 15" size. Sherwin Williams Urbane Bronze in Gloss finish.
I love the effect. It looks like wall paper and since the pattern is kind of large, the gloss effect gives it a "now you see it now you don't" appearance depending on the light.
Quick tip: I had to purchase four and lay them out in a diamond pattern and tape them together.
A level is your friend.
Once the first four are laid out on the wall, painting becomes a breeze.
If Burn hadn't eaten one of them it probably would have went faster.
If you are interested in a tutorial, let me know.
Pillows, barware, gold table lamp, and ceramic dog statues were purchased at T.J. Maxx
Acrylic table is older, purchased on Overstock.com
White leather sofa and white wool chair: Barbara Barry for HBF (perks of working a shitty job)
Items I need?
-An oversized, vintage looking mirror for over the white sofa.
-A piece of furniture, cabinetry or barware, that may need to be refinished (new DIY project!) and placed along the smaller wall next to the stairs
-Artwork over said piece of furniture
Now that I'm done with the bulk of this room; my dining room could use some color.
This looks like the perfect inspiration for a fantastic color palette:

And because no post is complete without a pic of a dog bundled up from the -30 temps outside...

TBag. Out.
